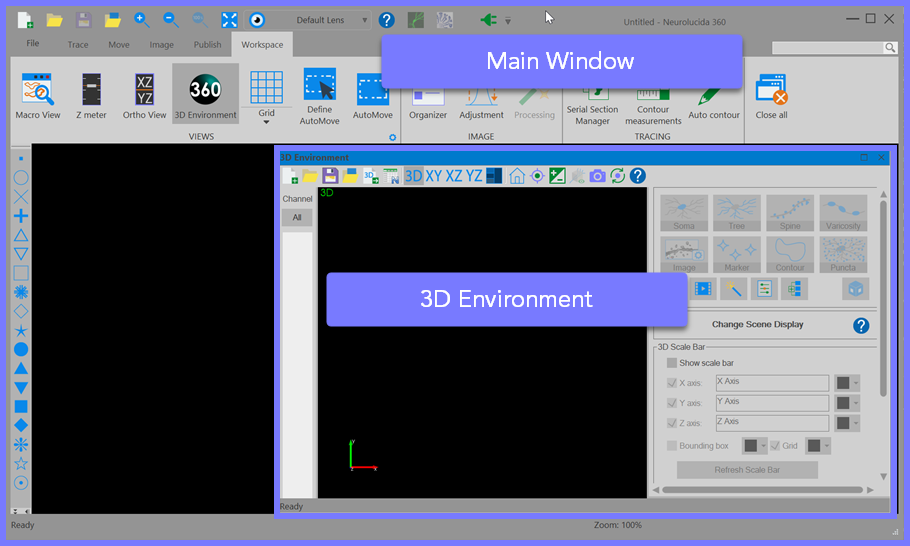
Neurolucida 360 interface
The Neurolucida 360 user interface has two principal windows:
- Main window: Includes the File menu and ribbon bars with tools for optimizing images, conducting batch processes, defining regions of interest, and setting software preferences.
- 3D environment: Tools for tracing/detecting structures to model your images, segmenting large/complex images to facilitate tracing, and capturing movies to present your work to others. Learn more here.
View the slideshow below for highlights of the user interface.
Main window and 3D Environment
When you open Neurolucida 360 software, both the 3D Environment and main windows will open.
You can dock the 3D window or close it (with the "X" in the upper right corner), but closing the main window will shut down Neurolucida 360 software.
Light and Dark interface themes
Go to File > Preferences > Display and choose the Light or Dark theme for the Neurolucida 360 software interface.
We created the Dark theme for working with fluorescence images
and recommend the Light theme for brightfield images.

Ribbon bars in the main window
- Tools for working in the main window are grouped by tasks. Some "buttons" appear on more than one ribbon bar to help facilitate your work.
- Tools are clustered into groups on each ribbon. Press the gear icon
 to go right to Preferences that affect the tool group.
 - You can hide the ribbons to expand your working space by right-clicking the ribbon area and choosing Minimize the ribbon
The Workspace ribbon includes all of the dockable windows.
![]()
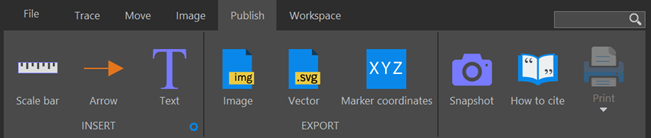
The publish ribbon includes tools for sharing your work with others, such as adding a scalebar, and exporting images of your tracings in image or vector formats.
The Image ribbon includes tools for adjusting and organizing images, batch filtering, and many other functions.

Quick access tools
The top of the main window includes tools to help speed up your work.
Quick Access bar
The Quick Access bar contains the most frequently used tools.
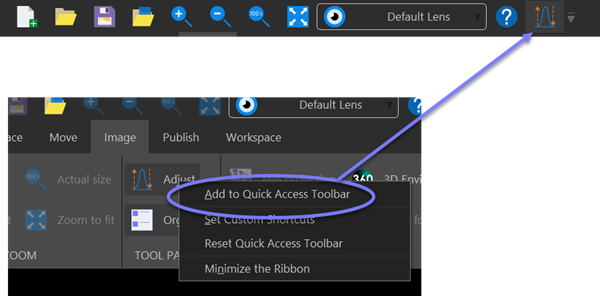
Add any tool in the Main window to the Quick Access toolbar by right clicking on it and choosing Add to Quick Access Toolbar
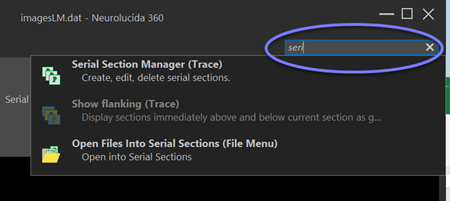
Quick Launch/Tool search
If you can't find a tool, but know its name, type it into the Quick Launch box on the right. Neurolucida 360 software searches for the tool and displays choices. Just click a choice to go to that tool.
Drag and drop files to open them
The easiest and quickest way to get started with Neurolucida 360 software is to simply drag and drop files onto the application window. You'll see one of two windows open next, depending on whether you drop image or data files. Either way, these dialog boxes enable you to indicate how you want the software to handle your files.
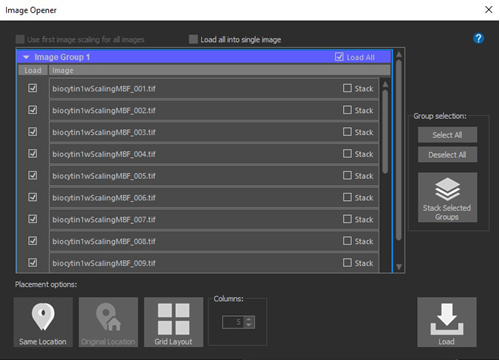
Image and image-containing filesfor example Leica .lif or Zeiss .czi files the Image Opener window appears: |
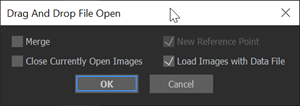
Data filesfor example MBF Bioscience .dat files the Drag and Drop File Open window appears: |
|
|
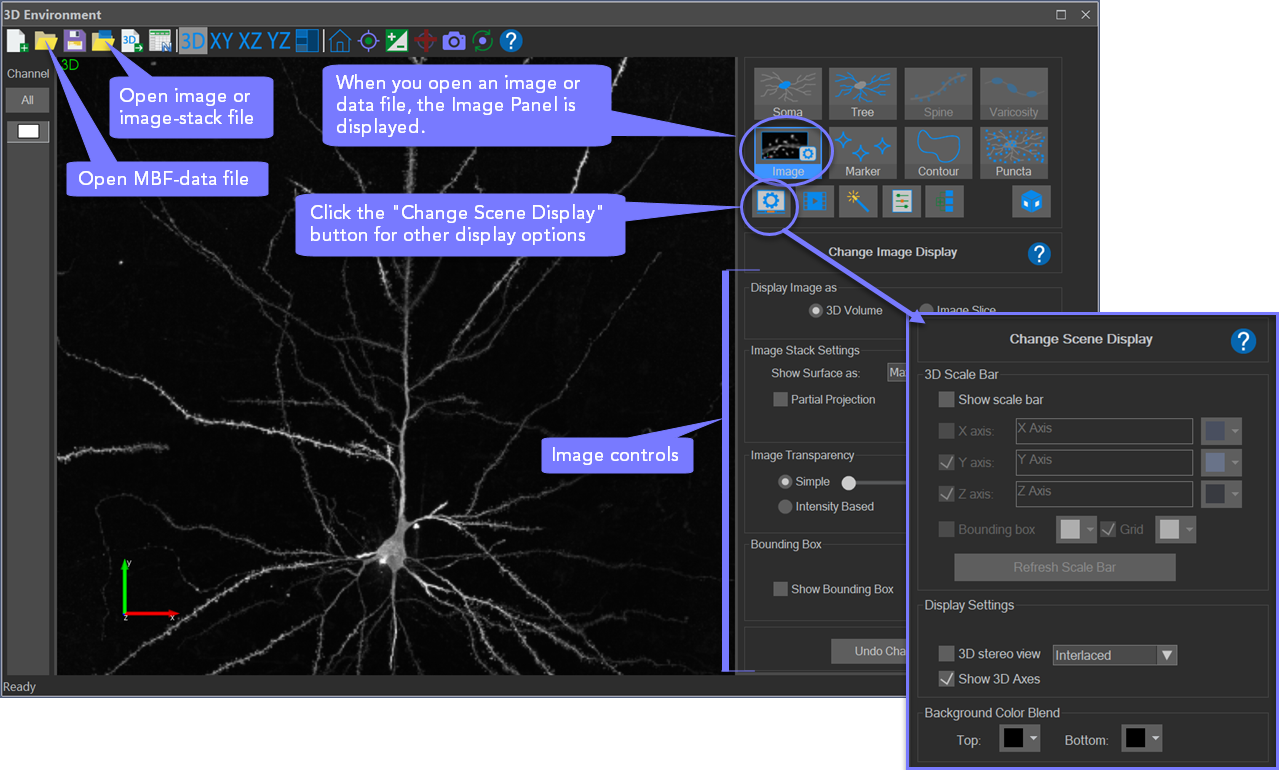
3D Environment
 If it's not already open, click the 3D environment button on either the Image or Workspace ribbon to open the 3D environment.
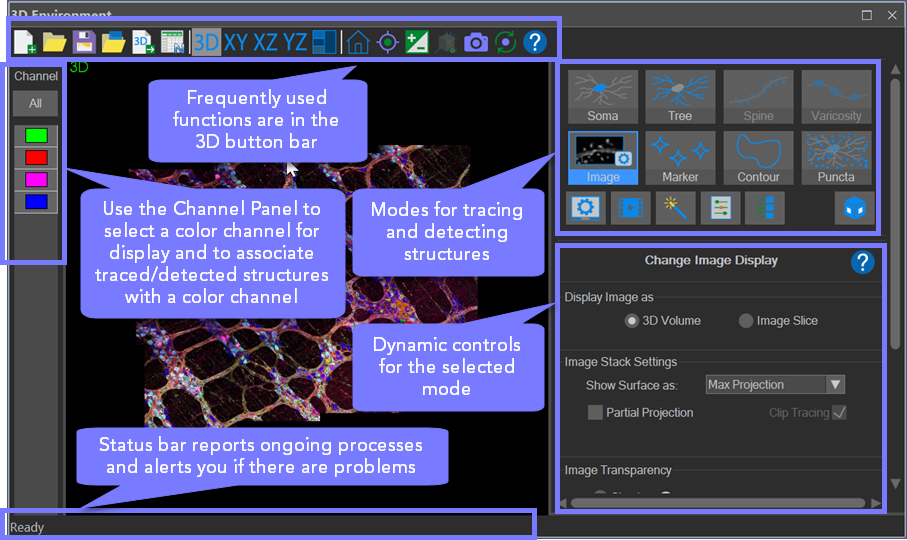
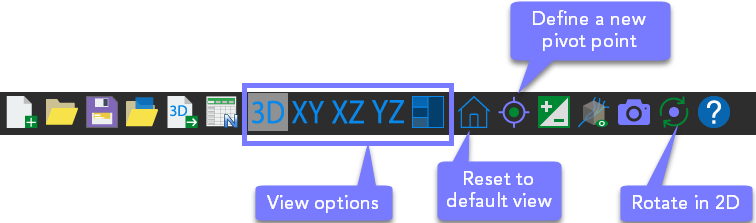
Navigating in the 3D environment
Use your mouse and the navigation tools in the 3D button bar
 Use your mouse to:
- Load images by dragging and dropping them onto the Neurolucida 360 window. The Image Opener and/or the Image Scaling dialogs will prompt you for information about the files if needed.
- Rotate: Drag the mouse to rotate the image around a pivot point.
- Zoom: Scroll the mouse wheel to zoom in or out.
- Pan: Hold the Shift key on your keyboard and drag your mouse to pan.
The 3D environment button bar includes many commonly used functions (some are repeated from the main window).
Customize image and scene display
Learn more about Image mode
Learn more about changing the Scene display
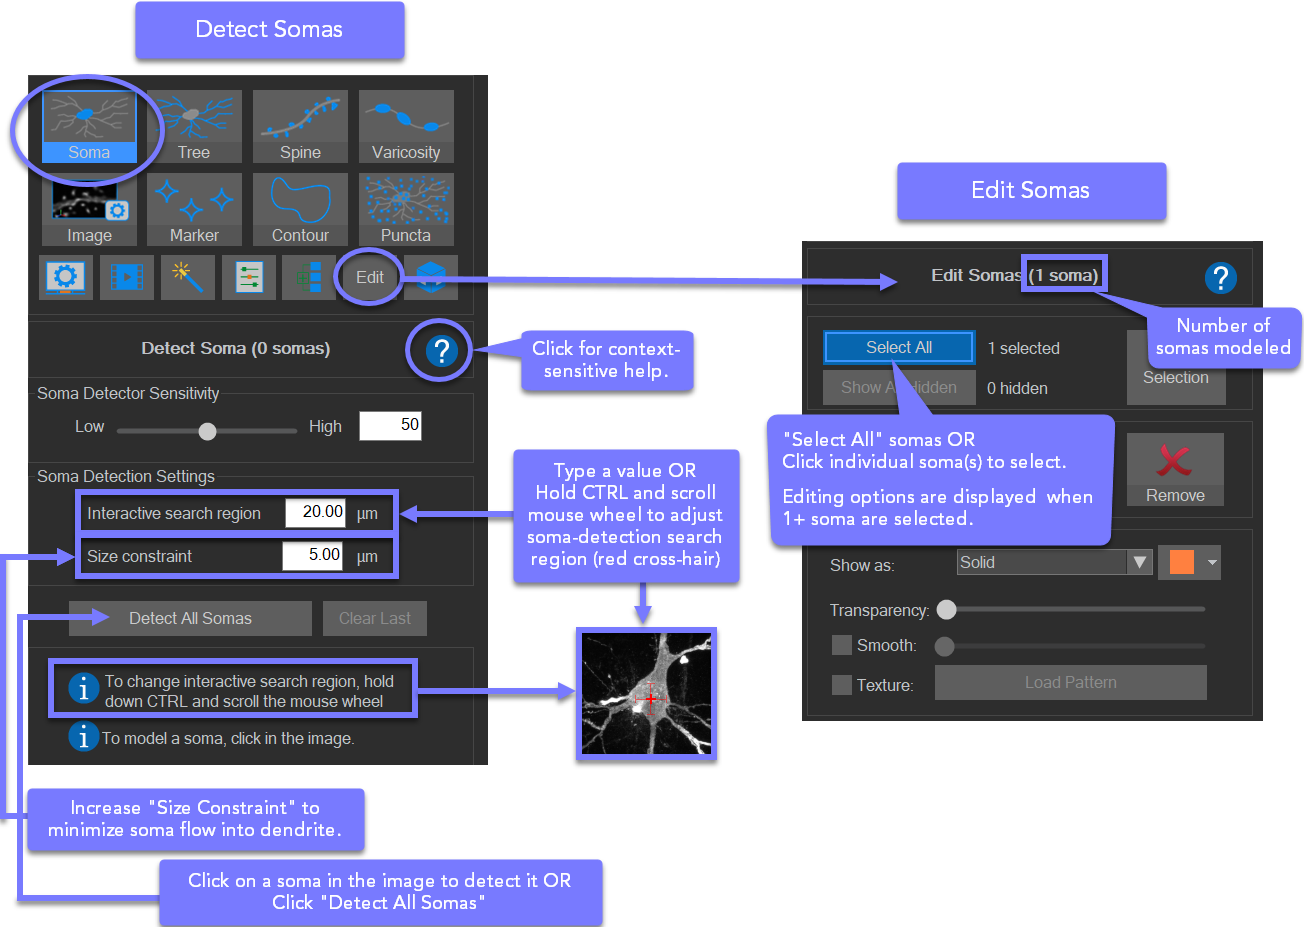
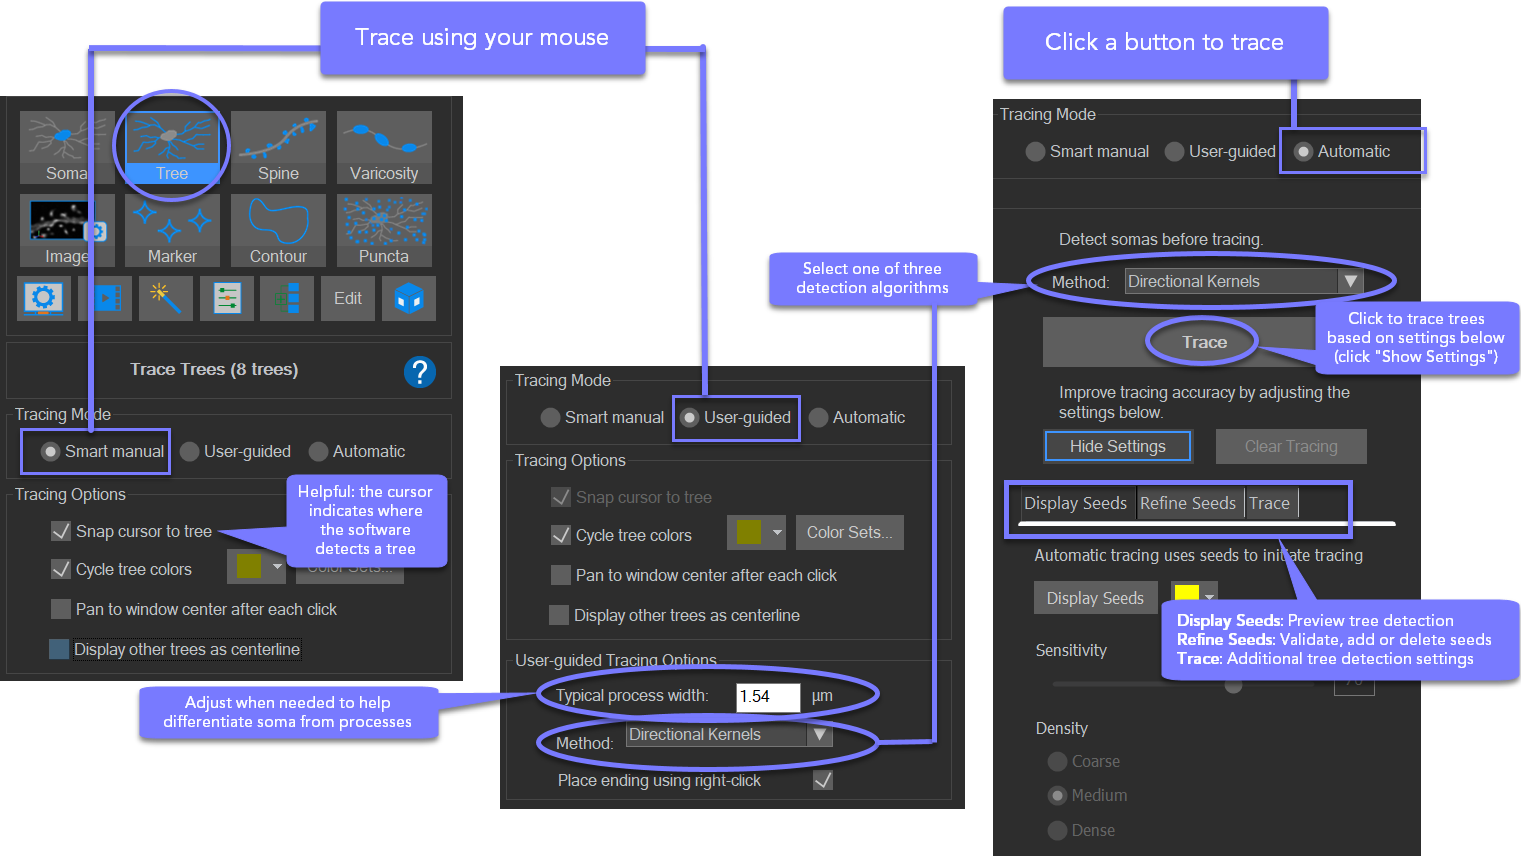
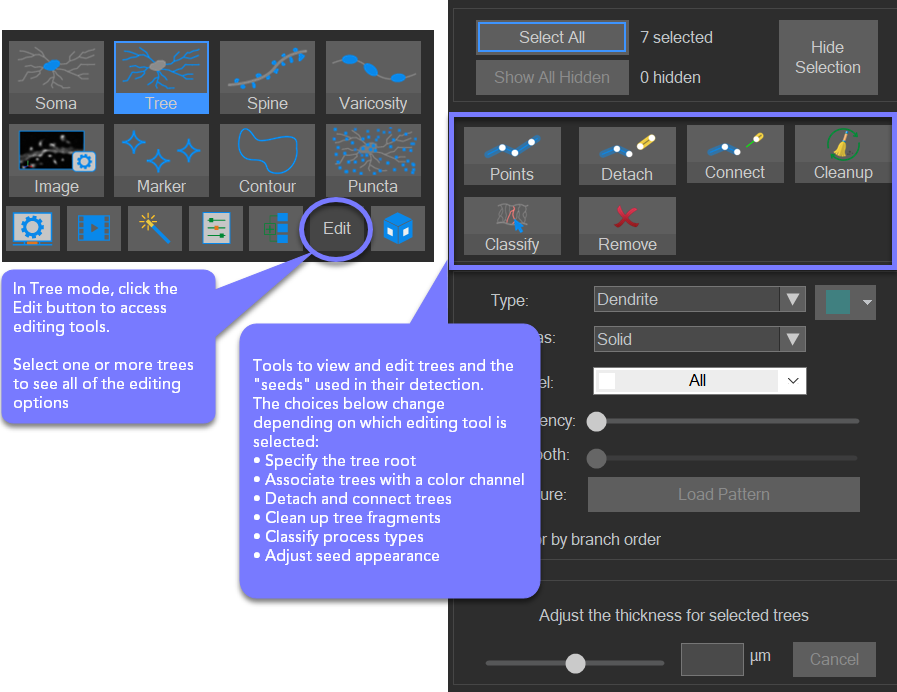
Tree tracing and detection
Trace trees using smart manual or user-guided tools, or let Neurolucida 360 software detect them automatically.
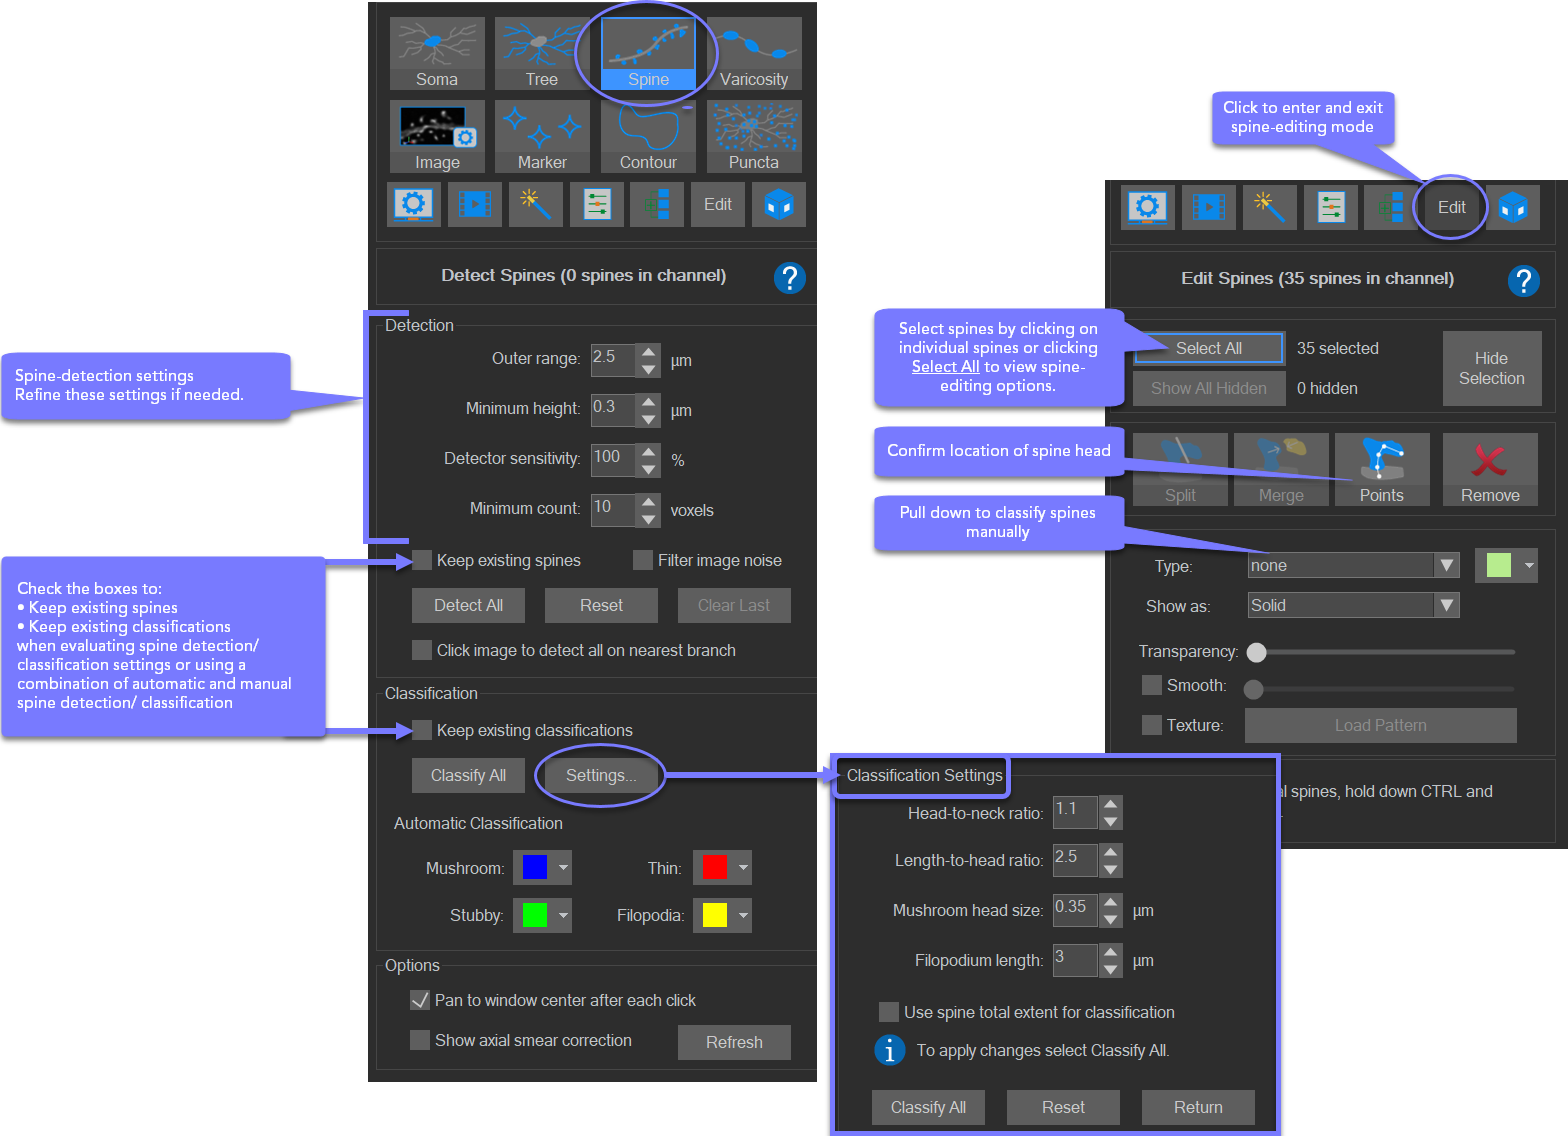
Spine detection and editing
After you have traced or detected at least one tree, you can detect spines, then edit spines on your traced structures.
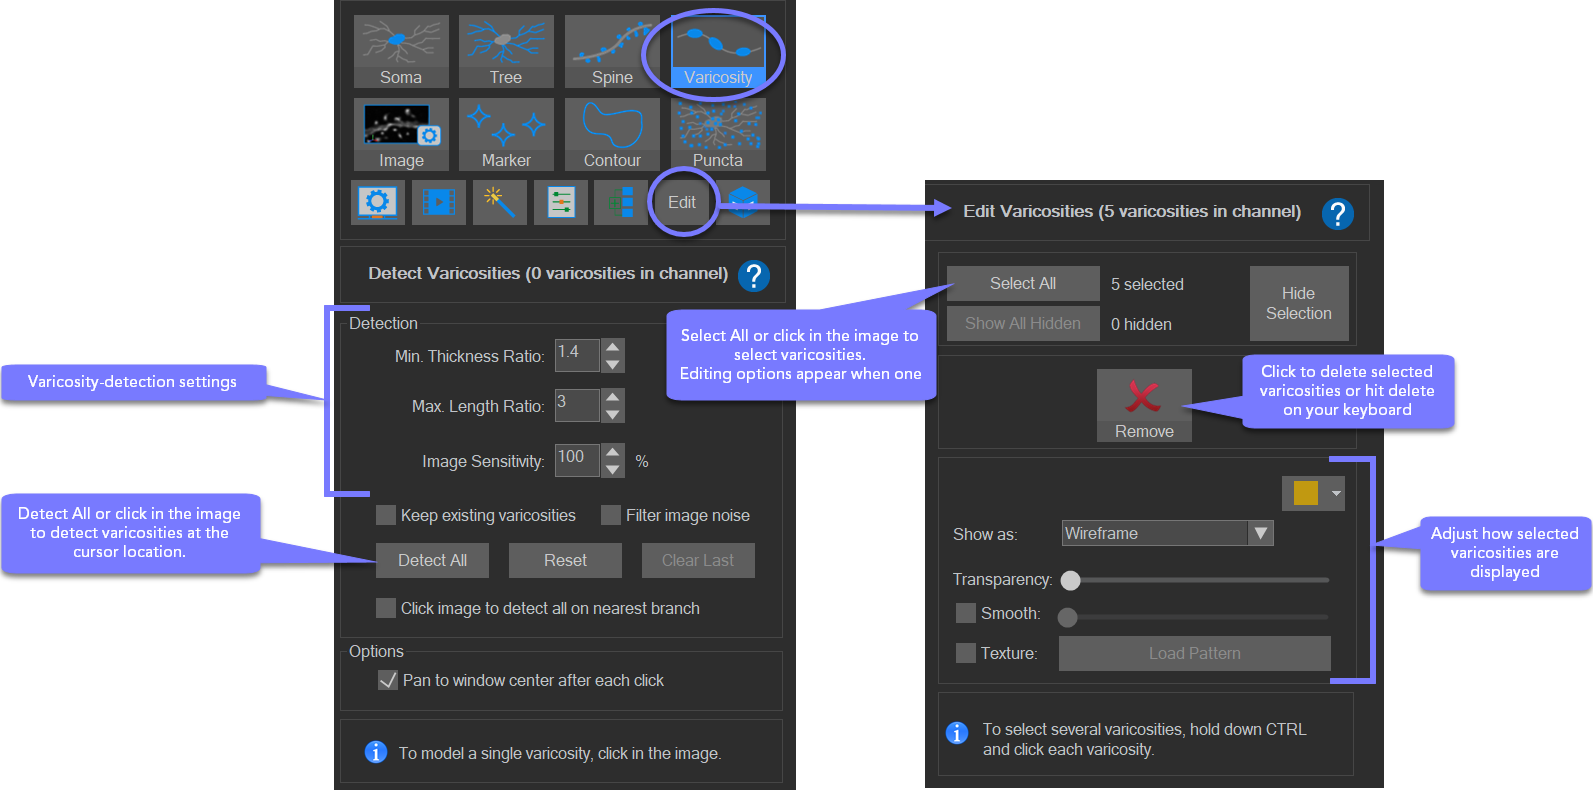
Varicosity Detection and Editing
Tools for varicosity detection and editing are similar to tools available in other modes.
Detect at least one tree in your image to access varicosity-detection mode.
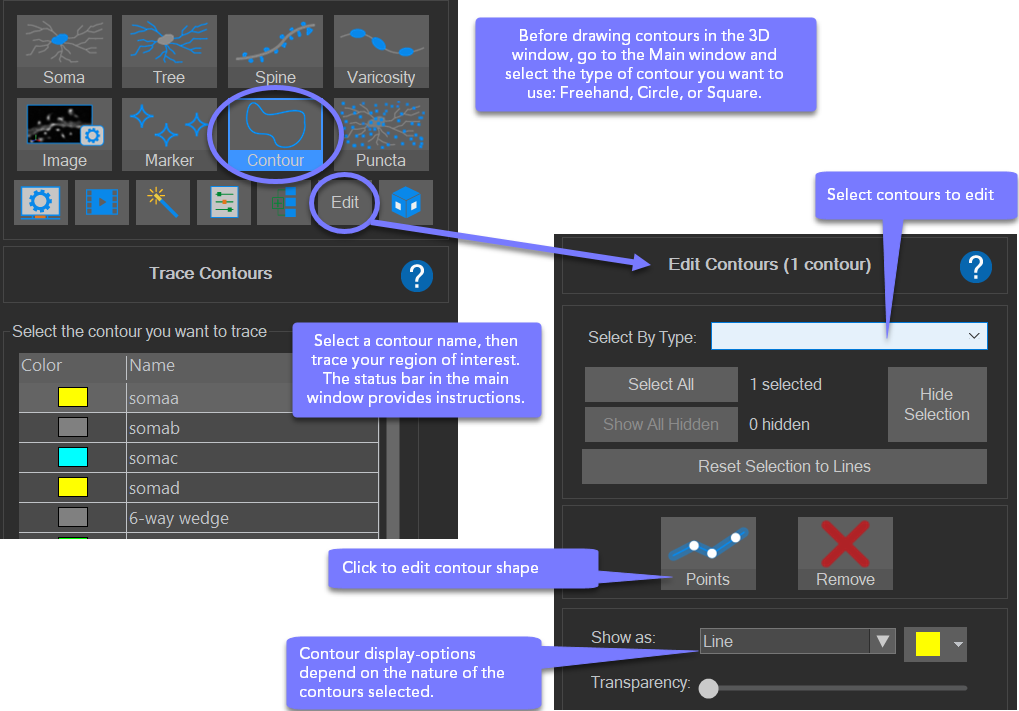
Contour drawing and editing in the 3D environment
Contours are 2-dimensional shapes that can be drawn in either the main window or in the 3D environment to define regions of interest.
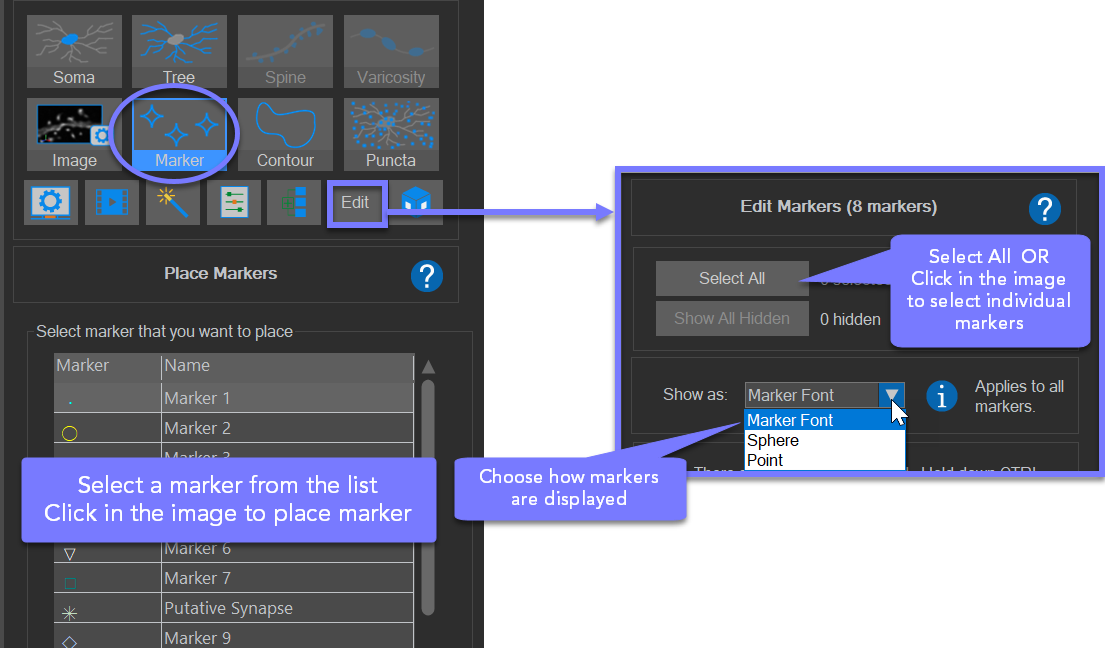
Marker placement and editing
Place markers in either the main window or in the 3D environment (shown in 3D below)
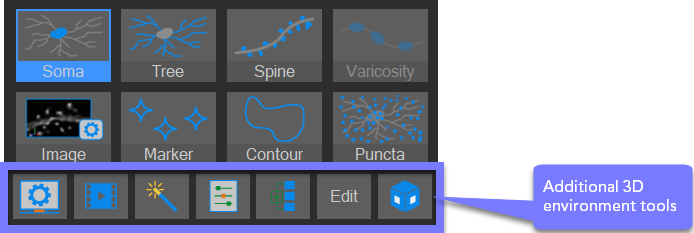
Additional tools in the 3D environment
Under the buttons for tracing and image modes in the 3D environment are an additional set of tools for working with your images.

|
Change Scene Display: Click the button to modify display settings, such as adding scale bars, 3D-stereo effects, and background colors. |

|
Create Movies: Create mp4 movies of your images or tracings. |

|
Post-Processing: Access options for post-processing to enhance the graphic display of your modeled structures for publication. |

|
3D Settings: Save your settings for automatic detection and tracing of structures. |

|
Sets: Group traced structures into sets for later analysis in Neurolucida Explorer software. |

|
The Edit button appears when editing functions are available. For example to edit somas, trees, spines, markers, or contours. |

|
Subvolume: Specify subvolumes (regions of interest) and load image data only from those regions. You can then work in easily managed portions of the image volume. By creating subvolumes that overlap slightly, you can reconstruct the entire image volume piece by piece. |
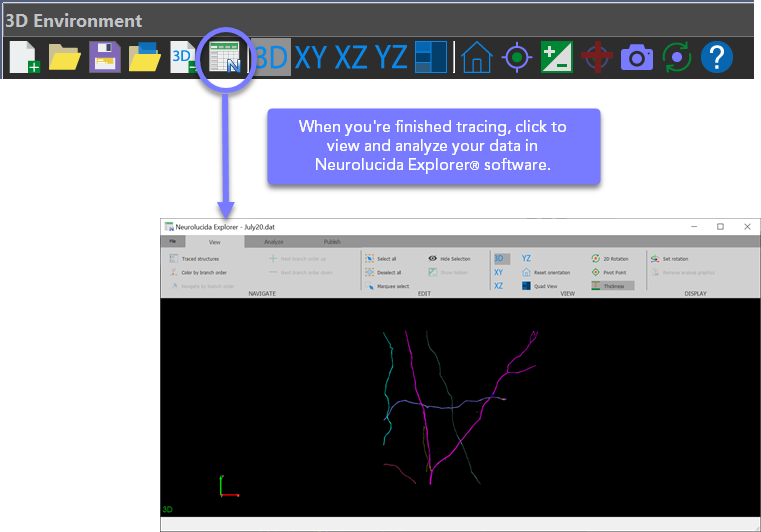
Data analysis in Neurolucida Explorer