Tracing and editing contours (3D)
See also Tracing contours (2D) and Selecting and editing contours (2D) to place and modify contour shapes in the Main (2D) window.
Tracing contours
- In the Main Neurolucida 360 window, Trace ribbon, select the contour type that you want to draw, e.g., Freehand, circle, square.
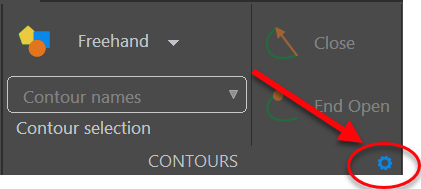
- In the 3D environment, click the Contour button.
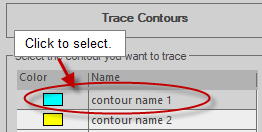
-
Click a contour type from the list to select it.

To change the names of the contour types,
from the

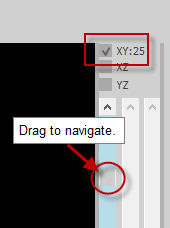
- Navigate to the desired area by selecting the view (XY, YZ, or XZ) and by dragging the slider.

- Start clicking around the area of interest to trace a freehand contour.
- Continue navigating through the planes and clicking as needed to continue the contour.
- Right-click and select close contour or End open contour to end the contour.
To trace circular or rectangular contours, select the shape from the Trace ribbon in the main (2D) window first, then go to the 3D environment.
Editing contours
With Contour mode active, click the Edit button to display the editing options.
There are several methods:
- Select by type: Use this drop-down menu to select all contours traced with a single contour type; useful when you want to render a series of contours as a wireframe or a shell.
- Select All: Use this button to select all contours, regardless of the type.
- Single click: To select a single contour, click it in the tracing window.
Hide selected contours with the Hide Selection button to facilitate tracing. You may display the hidden contours again with the Show all hidden button.
Use this button if you've changed the rendering of the contour from the default line to another option.
Use the Remove button to delete selected contours or press the Delete key on your keyboard.
If you delete a contour, you can't undo this action.
Choose from the show as drop-down menu to change the rendering of selected contours.
Notes on contour display
- To render as a shell or a wireframe, at least three contours with the same name must be selected.
- Conversely, if too many contours with the same name are selected before choosing to Show as as shell or wireframe, a message that says the shell cannot be built may be displayed. If there are more than one contour with the same name on the XZ or YZ plane, Neurolucida 360 software cannot generate a surface rendering. To circumvent this problem:
- Select fewer contours and try again. You can do this multiple times.
- Rename contours to have one contour of each name on the XZ or YZ plane.
Use the points button to edit the shape of selected contours.
To modify the shape, click a point and drag it to the desired location.
Adjust point display: Useful to visualize the contour points better; changing the point size only applies to the display and will NOT affect the tracing data.
To edit a circle, click to select it then click Points: the center point of the circle and one of the outer ring points are highlighted.
- To move the contour, drag the center point.
- To resize, drag either point.