Tracing vessels using user-guided mode (3D)
Available with the Neurolucida 360 Ultra package only. Click here for more information.
Before you start
-
Open an image stack or single images.
-
Make image adjustments as necessary.
-
Click the 360 icon to open the 3D Environment window.
-
If you're using the 3D Volume view, select Partial projection under Image stack settings in the Change image display panel.
-
 Click the Vessel button to display the Trace Vessels panel.
 -
Select User-guided as the Tracing Mode.
Tracing options in User-guided mode
-
Snap cursor to vessel: [Selected by default in User-guided mode]
-
Cycle vessel colors: A new color is used every time you start a new vessel.
-
Pan to window after each click: Each point you click that falls outside the field of view is re-centered automatically.
-
Display other vessels as centerline: Displays vessels that are already traced as lines (instead of showing thickness).

-
Typical process width: This setting helps guide the algorithm during tracing and is especially helpful when there is a large range in vessel sizes. In this case, enter the typical width of the larger vessels.
-
Method: You can use any of the included tracing methods. The tracing methods are based on algorithms that work by tracing along the vessels one point at a time, and by producing three measurements at each point: (X,Y,Z) coordinate, thickness, estimated position of the next point.
 Click to expand and learn about the different methods
-
Directional Kernels: With this method, four directional kernels are matched to the image data. For a given point within the vessel, the algorithm identifies the best positions and orientations for the top, bottom, left, and right kernels surrounding the point. The positions and orientations results are combined to estimate the next point to trace. Points are estimated until a set of stopping criteria is met.
For details on the algorithm, see Rapid automated three-dimensional tracing of neurons from confocal image stacks (Al-Kofahi, Lasek, Szarowski, Pace, Nagy, Turner, and Roysam, 2002).
-
Rayburst Crawl: This method performs rayburst sampling measurements to obtain the diameter and centroid of the cross-section of the vessel. Successive measurements are used to position the nodes that define its centerline. Points are estimated until a set of stopping criteria is met.
For details on the rayburst sampling algorithm see Rayburst sampling, an algorithm for automated three-dimensional shape analysis from laser scanning microscopy images (Rodriguez, Ehlenberger, Hof, & Wearne, 2006).
-
Voxel Scooping: This algorithm generates clusters of voxels iteratively along the vessel. These clusters are then used to position the nodes that define the centerline of the vessel. As in the other methods, points are estimated until a set of stopping criteria is met.
For details on the algorithm, see Three-Dimensional Neuron Tracing by Voxel Scooping (Rodriguez, Ehlenberger, Hof, & Wearne, 2009).
-
CNN Sectioning: This algorithm builds on the Rayburst Crawl method by making use of a pre-trained Convolutional Neural Network (CNN) to dynamically segment the local image cross-section before performing each Rayburst Sampling measurement. This segmentation step makes it possible for the algorithm to correctly estimate the diameter and centroid of hollow vessels.
-
-
Place ending using right-click:
-
When the checkbox is clear, a menu with choices will be displayed when you right click.
-
When the box is checked, right clicking ends the vessel and no menu is displayed. If only the first point of a vessel has been entered, right clicking will undo the first point and delete the tree you just started.
-
Tracing a vessel
To undo your last click, press CTRL-Z.
-
Choose options. We recommend the following:
-
Select Pan to window center after each click to avoid having to pan manually to move the view as you trace. (To pan manually, press SHIFT and drag.)
-
Uncheck Place ending using right-click to display the right-click menu when you right-click.
-
Select a method for tracing (see About the user-guided tracing methods section below).
-
-
Enter the width of a typical vessel in Typical process width under the heading User-guided tracing options.
-
Trace the first vessel:
-
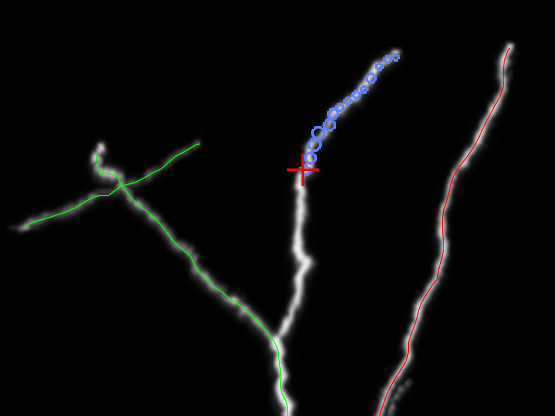
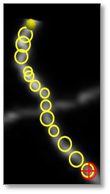
Place the cursor over the area of the vessel where you want to place the first point. When zoomed in, you see the red cursor and a circle. The circle diameter represents the segment width detected.
-
Click to place the first point. A sphere represents the first point.
-
Hover over the vessel. A series of circles is displayed, representing the path detected by the software.

-
Continue to click along the vessel to place more points.
-
When the vessel is no longer visible, move one of the partial projection sliders to reveal more of the vessel and continue tracing.
-
Click to place the last point. This may be the point where a loop closes.
-
Right-click once to end the vessel. If you selected Place ending using right-click, you won't see any right-click menu.
When the vessel is effectively ended, you can see a sphere at the end of the vessel or partial spheres along the vessel as you hover, and the vessel count is updated.

-
-
Connecting to an existing vessel (once you've traced at least one vessel):
- Start tracing another vessel: click to place points along the vessel.
- As you approach a potential connection point on the other vessel, the circles' color changes to reflect the color of the existing traced vessel.
- Click to connect.
-
Resuming the tracing of a vessel when you've already traced and ended (with a right-click) a vessel:
- Hover over the point on the vessel where you want to resume tracing. You should see a sphere or a partial sphere displayed over the tracing.
- Click.
- Resume tracing.
See Tracing vessels using automatic mode (3D) and Tracing vessels in smart manual mode (3D)