Manually Calibrating lenses
(Formerly grid-tune current lens.)
Purpose
Once you've added and tightened the objectives to be calibrated and precisely aligned camera and stage, you can calibrate your lenses using a calibration grid slide.
Conduct the calibration on each lens that you plan to use with Neurolucida, starting with the lowest-power objective and continuing in order of lower- to higher-powered lenses.
Instead of calibrating lenses manually, you may want use the Auto-calibration function.
Material needed
MBF Bioscience calibration-grid slide
Note that you should not use oil for oil objectives during calibration as long as you can clearly see the grid lines on the screen. Using oil can be problematic because it can result in slides moving when the oil is wiped from them to switch objectives.
Before you start
-
Check camera-stage alignment and adjust if necessary.
Watch a video (You Tube 3:10) or review a PDF of the procedure
Procedure
Do not use oil with oil objectives for this procedure.
-
Engage the objective to be calibrated on the microscope system and select the corresponding software lens in Neurolucida.
If you plan to calibrate all of the objectives on the system, start with the lowest-power objective and calibrate in order of lowest to highest power.
If there is no existing software lens, you'll need to create one; see Creating a Lens.
-
Load the MBF Bioscience calibration grid slide (or a graticule slide with known scaling) onto the microscope stage.
-
 Click Joy Free on the Move ribbon to control stage movements with the joystick and to enable moving the stage independently of the software grid.
 - Center the grid appropriate for the power of the lens in the center of the screen. Bring it into clear focus.
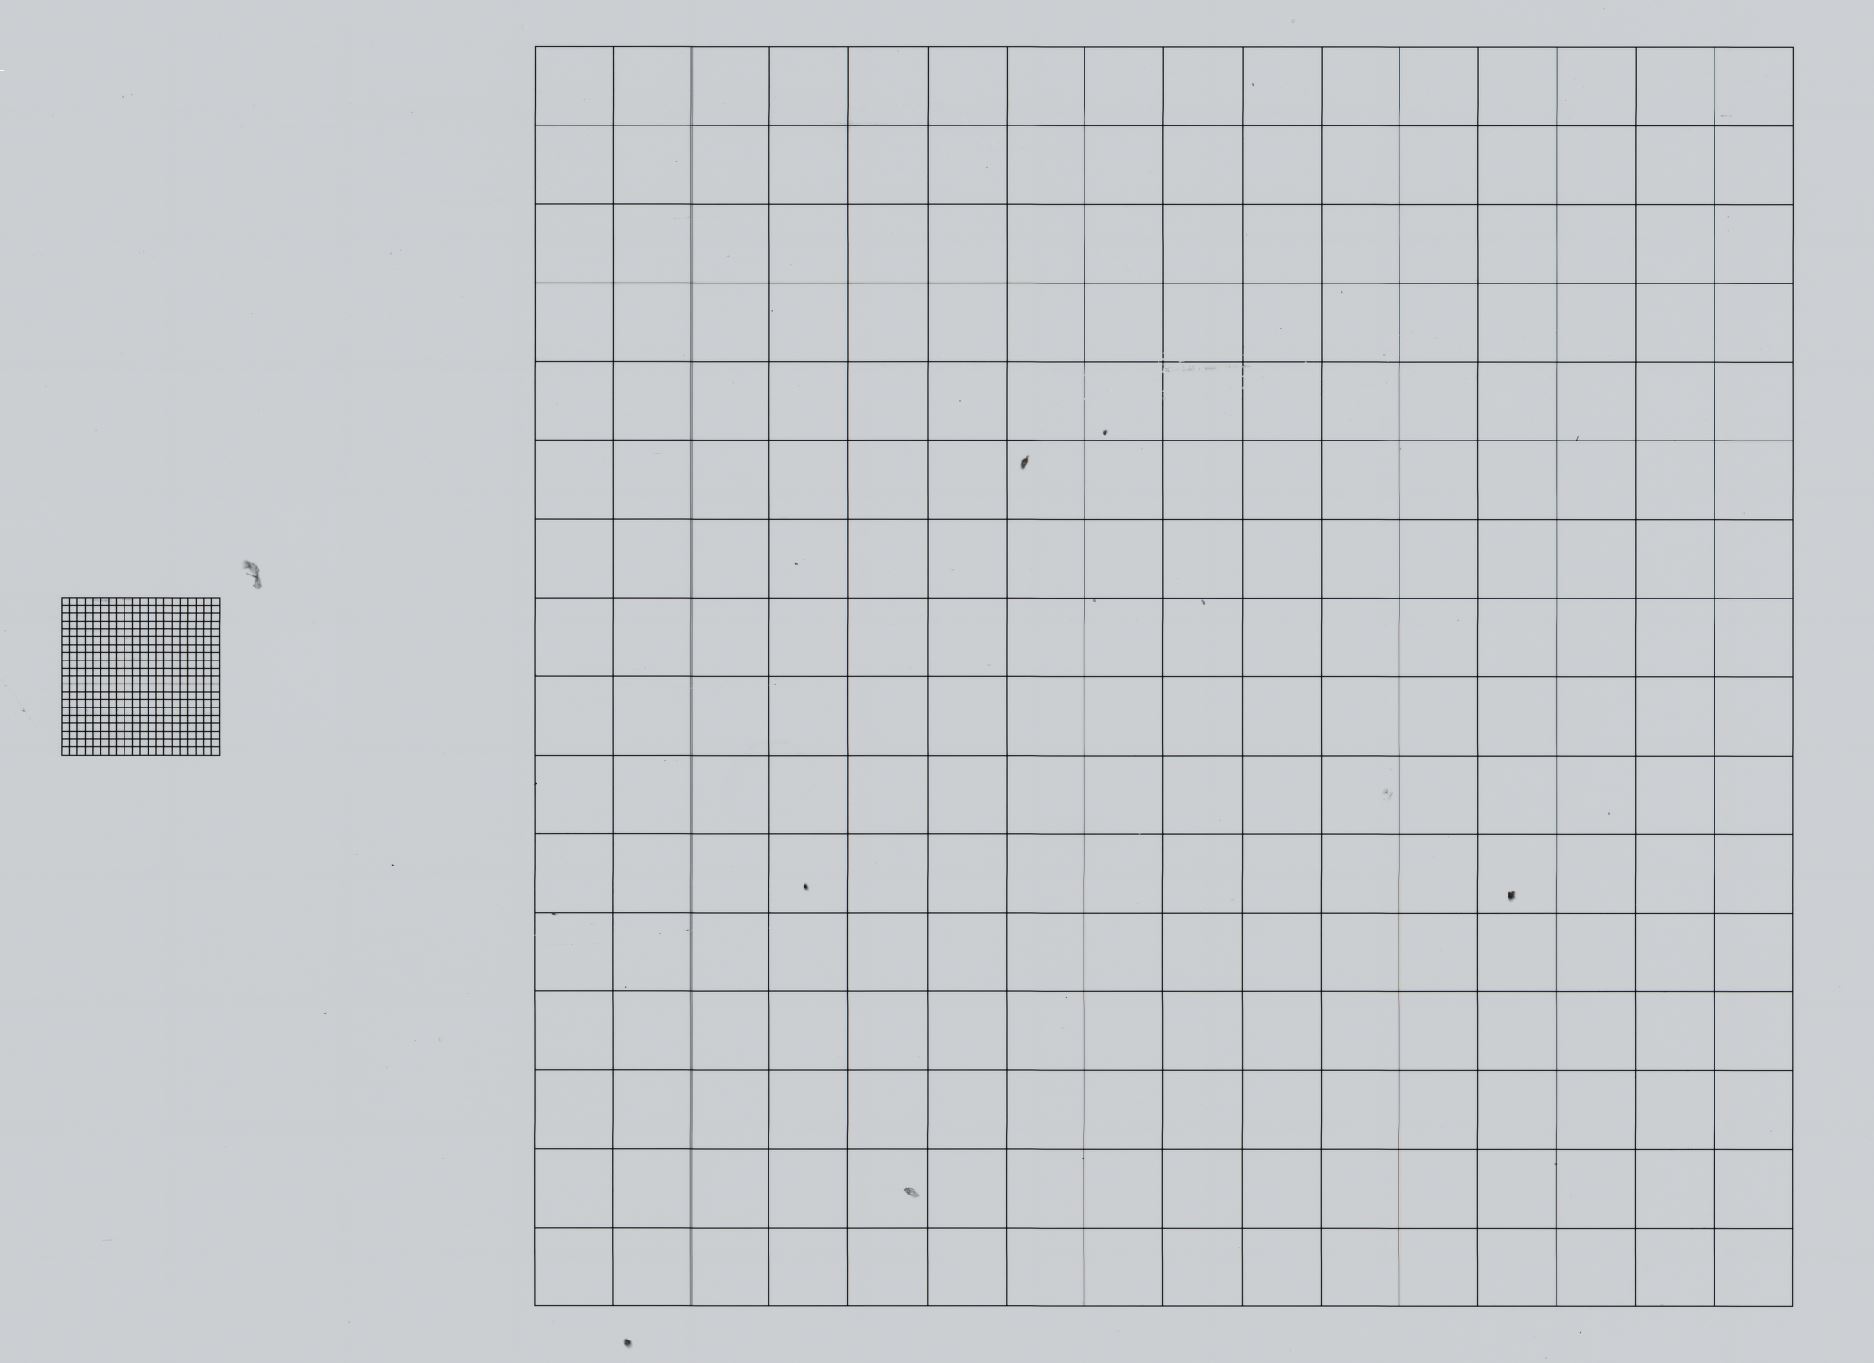
- 10x and lower: Use the 250 µm (large) grid.
- 20x and above: Use the 25 µm (small) grid.
- Turn off Joy Track.
-
 Go to File > Calibration and click Recalibrate Lens.
 Enter the box size of the grid you're using (25 µm or 250 µm).
-
A white grid with dotted lines appears in the main software window. Align the white grid with the slide grid (black lines).
If the slide grid appears to be lopsided compared to the white calibration grid on the screen, first check that the slide is properly seated in the slide holder. Next, make sure that camera and stage are properly aligned.
- Drag the anchor to the corner of a cell located in the top left of the screen.
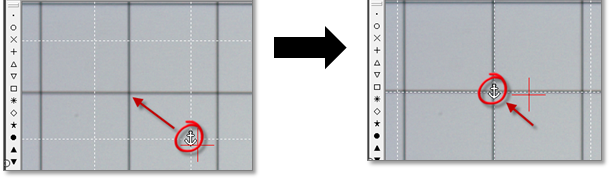
Align the vertical line closest to the anchor.

Hover the mouse over the grid lines until the cursor changes to a double arrow.
Drag one of the vertical white dotted lines to align it with the vertical slide grid line near the anchor.
Align the horizontal line closest to the anchor.
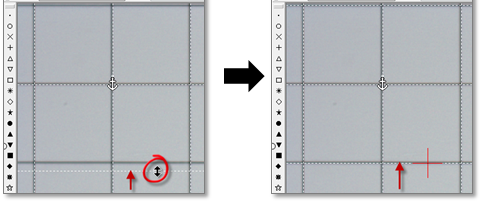
- Hover the mouse over the grid lines until the cursor changes to a double arrow.
- Drag one of the horizontal white dotted lines to align it with the horizontal slide grid line near the anchor.
- Evaluate the overall alignment of the white grid with the slide grid. Near the anchor, the two grids should be well aligned. Further from the anchor, alignment may somewhat off due to edge effects, however, if the alignment at edges is way off, repeat steps b-c further from the anchor to align the grids across the entire field of view as accurately as possible.
- When the white grid is aligned with the slide grid near the anchor as accurately as possible, right-click and select Finish Calibrating Current Lens
- Drag the anchor to the corner of a cell located in the top left of the screen.
- (If applicable) Repeat steps 3-6 for the next objectives, from lowest to highest power.