Tracing neurons (2D)
See also Using markers, Tracing contours (2D), Placing spines (2D)
Before you start tracing, you might find it useful to read Preparing to trace. In most cases, starting with the cell body and working outward produces the best results.
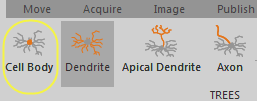
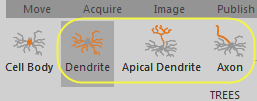
Neuron tracing options are on the Trace ribbon, in the select Trace>Mode>Neuron, then click the type of object to trace in the Trees group. 
- Click Cell Body.

- Trace the cell body (this is similar to tracing a contour):
- Choose a focal plane (e.g., focal plane near the center of the cell body).
- Click to place the first point.
- Continue to click to place the next points to trace the contour of the cross-section.
- After you've placed the last point, right-click and select Finish Cell Body.
- Draw a single cross-section to represent the cell body in two dimensions, or move to different focal planes and trace multiple cross-sections of the cell body to create a three-dimensional representation.
A cell body is always a closed feature; unlike contours, it is not possible to have an open cell body.
- Click Dendrite, Apical dendrite or Axon.

If you are not sure about the type, select any tree type; you can change the type later. See Tree Types in Editing Trees.
- Focus.
- Place the cursor over the edge of the cell body at the location where the process exits.
- Record the diameter of the process: Use the mouse wheel or the + and – keys on the numeric keypad to set the circular cursor to match the diameter of the process.
- Start tracing: Click to place the first point to outline the process.
 Displaying thickness
To display the thickness, go to File > Preferences > Tracing and check Display Thickness in the View section.
If displaying the trees at their designated thickness obscures the tracing of other processes, you can:
- Click Trace>View>Thickness to disable it. The trees are then displayed as thin lines (but thickness is still recorded).
OR
- Increase the transparency of the tracing: Go to File > Preferences > Tracing and use the slider under Tracing Transparency in the View section.
- Continue to place points along the process in short increments, adjusting the focus and cursor diameter before placing each point. If the process branches, place nodes and trace the branches. See Tracing branches below.
-
When you reach the end of the process, right-click and select Ending or End Tree to mark the end of the branch:
See Ending Types to learn about ending options. To display endings, click the cog icon
 in the Neurons group of the ribbon to open preferences and check the box to show Ending labels.
-
Ending: Neurolucida 360 takes you back to the previous node (indicated by a flashing circle) to continue tracing.
-
End Tree: You can continue tracing from any node; an "N" is displayed as you hover on a node.
-
To mark a point where the process branches, place a node:
- Right-click and select Bifurcating Node or Trifurcating Node.
- To add or modify nodes later, see Nodes and Branches in Editing Trees.
- To display the nodes, click the cog icon
 in the Neurons group of the ribbon to open preferences and check the box to show Nodes.
- Trace the branch, adjusting the focus and cursor diameter before placing each point.
- When you reach the end of the branch, right-click and select Ending to mark the end of the branch. You are automatically returned to the node (indicated by a flashing circle).
- Trace the other branch originating from the node: Click to place the next point after the node and continue placing points.
When you reach the end of the branch, right-click and select Ending or End Tree.
See Ending Types to learn about ending options. To display endings, click the cog icon
 in the Neurons group of the ribbon to open preferences and check the box to show Ending labels.
Ending: Neurolucida 360 takes you back to the previous node (indicated by a flashing circle) to continue tracing.
End Tree: You can continue tracing from any node; an "N" is displayed as you hover on a node.
- Continue until all branches in the process are traced.
- Start tracing the AcD (Trace>Tree>Dendrite type).
- When you reach the area from which the axon emanates, right-click and select Bifurcating node.
- Continue tracing the AcD and end it. The program redirects you to the node. Right-click and select Ending.
- Switch to Edit mode: click Trace>Edit>Select objects.

- Click the node, right-click and select Add tree. The program switches back to Trace mode.
- Trace the axon.
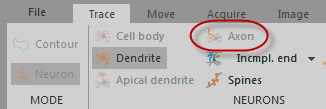
The axon can only be traced using the tree type that was selected to trace the AcD (axon is disabled).
 To assign the correct tree type, switch to Edit mode, click the axon to select it, right-click and select Change tree type then select Axon.
If your AcD and axon are already traced but not connected:
- Switch to Edit mode: click Trace>Edit>Select objects.

- Click the proximal AcD tree to select it.
- Place your cursor over the area where the axon emerges. Right-click and select Insert node in tree.
- Click the tree to insert the node then right-click the newly created node and select Add tree. The program switches back to Trace mode.
- Place a point or two toward the axon, right-click and select Ending.
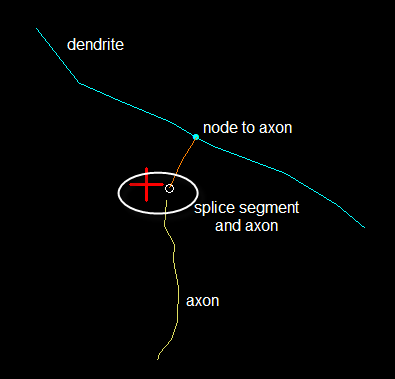
- Splice the new segment and the axon.

- Switch to Edit mode.
- Click the new segment to select it, right-click the end of the segment (close to the axon) and select Splice.
- You'll see a rubber band line extending from the segment end. Drag to the axon starting point and click to splice.