Image stack overview
Requires separate licenseThe Image Stack module enables you to focus through an image stack in real time. BrainMaker automatically keeps track of depth (Z-axis) values .
Most image stacks will load using the settings from the embedded scaling.
If there is no embedded scaling, the X and Y dimensions of the imported image default to the current lens. In this case, select the lens that was used to capture the images before loading the image stack. If the image stack was collected on a different microscope:
- Calibrate a lens for the remote system. See Creating a new lens from an image
- Select that lens before loading the image stack.
- Click File>Image Stack Open to open the Image Stack Open dialog box.
- Select an image file, and click Open.
- Click OK. The program displays the Image Scaling and Placement dialog box.
- Enter a focal distance (Distance between images). See Image scaling dialog.
- Click OK to load the image stack.
- Click File>Image Stack Open to open the Image Stack Open dialog box.
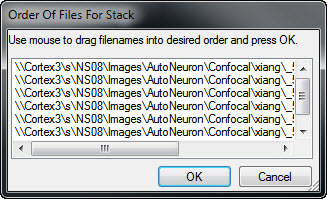
- Select the images and click Open. The program displays the Order of Files for Stack dialog box. If needed, drag files to correct the order of the list.
 .
. - Click OK. The Image Scaling dialog box is displayed.
- Click OK to load the image stack.
If you load an image for which there is no matching lens, BrainMaker prompts you to create a new lens to match the image scaling. See Creating a lens.
The top image of a stack is loaded at the current Z position of the software. When the stack is loaded, the top image of the stack is displayed.
The status bar at the bottom of the screen provides information about the plane on display.

- To navigate through the stack, use the Page Up and Page Down keys on the keyboard.
- To view the Z position, use the Z meter or the Image Organizer.
- To visualize an entire image stack in a single plane, use Image>Maximum Intensity Projection | Minimum Intensity Projection.
- To save the modified stack without altering the original file, use File>Save As>Image Stack.
- To save a single plane, use File>Save as>Image.
See (Image) Adjustment to learn how adjustments are saved.
Single file with multiple images
A multiple-image file such as a PIC or TIF file contains all of the images for one image stack.
The images are interpreted to be sequential images with the first images placed at the top of the stack and subsequent images placed at decreasing Z positions.
The first image is placed at the current Z position.
Multiple single-image files
The order in which multiple images from single-image files are loaded is determined by the order of the files in the dialog box.
We recommend using a naming convention that facilitates image ordering.
If you name a set of images image1, image2, image3, and so on, image10 is placed after image1 but before image2.
Instead, number the images as follows: image01, image02...image10, image 11... in order to maintain the correct order.
The images are loaded in the same order as the files appear in the File>Open dialog box.