Creating a new lens from an image
Purpose
Use this procedure to create software lenses from an image with known scaling.
Software lenses can be used to assign scaling information to image files that:
- Do not contain scaling information.
- Contain inaccurate (wrong) scaling information.
- Contain scaling information that BrainMaker cannot recognize/interpret.
Materials needed
An image with known scaling, for example one of the following:
-
Image of the MBF calibration-grid slide or a graticule slide with known scaling:
Acquire an image of the calibration-grid slide using the same objective that you plan to use in your study.
If you are using multiple objectives, acquire an image of the calibration grid slide with each objective.
- 10x and lower: Acquire an image of the large grid (250 µm).
- 20x and above: Acquire an image of the small grid (25 µm). Immersion media (oil, water, etc.) are not required for this step.
-
Image that includes an accurate scale bar
Procedure
-
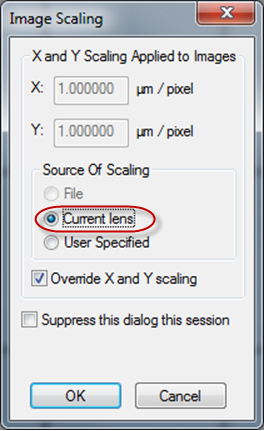
Open the image with known scaling in BrainMaker. The Image Scaling dialog box opens
 .
.If Current lens is selected under Source Of Scaling, check the Override X and Y scaling box. This enables you to define appropriate scaling when you create the new lens (step 4).
-
If you have more than one image open, use the Image Organizer to set the relevant image to be visible and hide any other images.
For example, if you are calibrating a 5X objective, the
 icon in the Image Organizer should only appear next to the large grid (250 µm) image.
 -
 Go to File > Calibration and click the New lens button.
 - If the image is not displayed at its original magnification, it is automatically adjusted to display at a 1:1 resolution.
-
Follow the instructions for Creating a New Lens:
-
Choose Manual Calibration for the Calibration Type
- Enter the size of the grid that is displayed onscreen under Calibration Box Setup.
- If you are calibrating from an image with a scale bar instead of from a calibration-grid slide, check the Force Square checkbox.
- Click OK to launch manual calibration. See Manually calibrating lenses for instructions.
-
- If you need to define multiple lenses from calibration grid images, show the image appropriate for the lens power and hide other calibration grid images by clicking to add or remove the icon in the Image Organizer, then and repeat this process for the other lenses.
- Use the Measure Line tool (Trace>Measure line drop-down) to verify that the calibration is correct.