Tracing trees
See also Tracing neurons (in single sections), Editing trees
Before you start tracing, you might find it useful to consult our article Preparing to trace. Then, select Trace>Mode>Neuron and click a tree type (to learn how to change the tree type, see Editing trees). 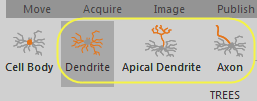
Tracing processes (axons and dendrites)
- Focus.
- Record the diameter of the process: Use the mouse wheel or the + and – keys on the numeric keypad to set the circular cursor to match the diameter of the process.
- Click to place the first point.
- Continue to place points along the process, adjusting the focus and cursor diameter before placing each point. If the process branches, place nodes and trace the branches (see Tracing branches below).
- When you reach the end of the process, right-click and select Ending to mark the end of the tree (see Ending Types to learn about ending options).
- To display endings, go to File>Preferences>Tracing>Neurons panel and check Show ending labels.
- To display line thickness, click Trace>View>Thickness (also see Line thickness).
Tracing branches
To mark where the process branches, place a node:
- Right-click and select Bifurcating Node or Trifurcating Node.
- To add or modify nodes later, see Nodes and Branches in Editing Trees.
- To display the nodes, go to File>Preferences>Tracing>Neurons and check the box to Show nodes.
- Trace the branch, adjusting the focus and cursor diameter before placing each point.
When you reach the end of the branch, right-click and select one of the following options to mark the end of the branch:
Ending: Neurolucida takes you back to the previous node (indicated by a flashing circle)to continue tracing.
End Tree: You can continue tracing from any node. You'll know that you are connecting to a node when an "N" is displayed as you hover on a traced tree.
The following short video demonstrates these options:
- Trace the other branch originating from the node: Click to place the next point after the node and continue placing points.
- When you reach the end of the branch, right-click and select Ending.
Placing spines or varicosities
- As you reach a spine or a varicosity, right-click and select Place spine or Varicosity (see Placing spines (2D) for details on spines).
- Resume tree tracing.