Automatic contour tracing
Purpose
 Trace contours on
Although automatic contour tracing is a powerful function, we recommend that you examine auto-traced contours and refine them manually.
Before you start
-
Open an image.
-
In the main window, click Contour mode on the Trace ribbon.
Procedure
- If the region of interest that you want to trace is just a small portion of your image, zoom in so that it is easily visible.
-
 In the main window, go to the Pipelines ribbon and click Auto contour.
 - Optional Click Show Advanced Settings.
- Click Start Initialization. Initialization enables you to guide the program in placing the first contour points.
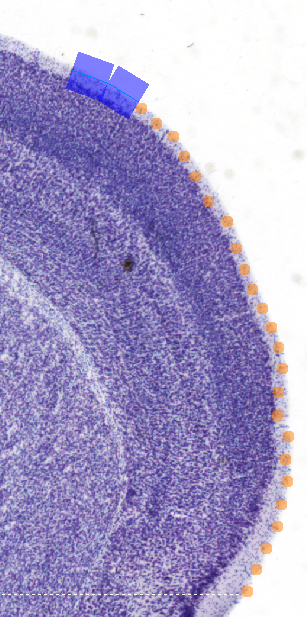
- Place two contour points manually. Stereo Investigator highlights the segments between the contour points in blue and suggests a path for the next contour points represented by orange circles.
- Click Stop Initialization.
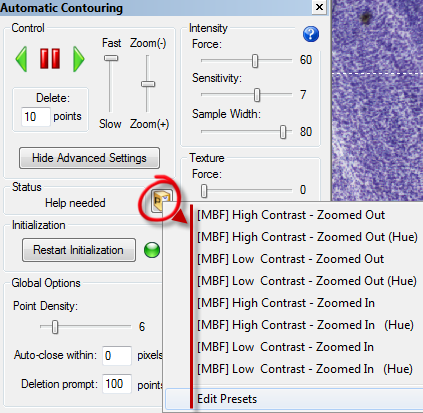
If you are not satisfied with the path suggested, click Restart Initialization.
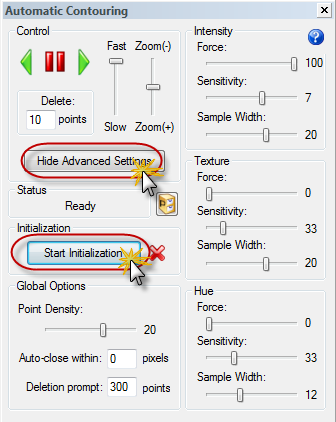
 See all Advanced Settings
Global Options
Point Density: Controls the frequency of the point placement during tracing. A lower setting means fewer points placed.
Auto-close within: Closes the current contour as soon as an added point comes within the set number of pixels of the contour start. 0 turns disables this feature. We recommend starting with a value of 30.
Deletion prompt: Controls a message box displayed when the number of points to be deleted exceeds the value set for the prompt. This helps protect you against accidental deletion of a large contour.
Intensity, Texture, and Hue
Each of these methods has the following controls:
Force: Controls the amount of force that a particular method has on each point placed. A lower Force value tends to move on more of a straight line.
Sensitivity: Controls when automatic contouring needs to stop and ask you for help—you will need to examine the tracing and make some decisions. A lower Sensitivity value requires less interaction, but it is more likely to wander into undesirable image areas.
Sample Width: Defines a region on either side of the contour which is sampled during contouring for making point-placement decisions. A larger Sample Width samples farther away from the contour.
Which control should I use? It is possible to use multiple methods simultaneously. However, you may get the best results by using one method at a time. To disable a method, set its forces to 0.
Presets
The presets are good starting points to create your own settings. Experimenting with them will give you a sense of how different parameters and options affect the results.
- To use the presets, click the Presets button and select a preset from the list.
-
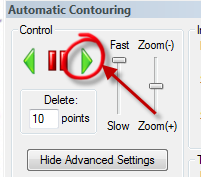
In the Control area, click the Forward arrow. The automatic contouring process starts.
-
 To interrupt automatic contouring, click the Pause icon.
 -
 To delete points, click the Back arrow or CTRL-Z on your keyboard.
 -
To resume manual tracing, click the Pause icon then place contour points manually.
-