Camera histogram
Purpose

|
The camera histogram displays a graphical representation of the dynamic range (visual brightness and contrast) of the live camera feed. Some details of the camera histogram vary among different cameras, depending on the driver used and the features supported by the camera.
|
Adjusting imaging hardware and evaluating the results using the camera histogram
To take full advantage of the dynamic range of the camera, the histogram should be spread over the entire X-axis throughout all fields of view, and it should drop to nothing at the edges of the histogram (indicating that it is not overexposed).
To achieve this, we recommend adjusting the following:
-
Turn up or down the illumination amplitude.
-
Add or remove neutral-density filters.
-
Adjust the exposure (the amount of time that the camera system collects light from the specimen on the microscope) in the Camera settings panel.
-
Adjust the gain (the sensitivity level that camera amplifies detected signal during digital conversion) in the Camera settings panel.
Camera histogram panel settings
Adjusting the display of the live camera feed
You can adjust the display of the live image by typing values into the boxes below the histogram or dragging the controls on the histogram as described below. Note that changing the camera histogram in this way does not affect the image data acquired; but, if you choose the MBF JPEG2000 or MBF TIFF file type when saving, the display adjustments are saved with the images:
- Black point: (black triangle) The black point is the pixel intensity that defines the lower (left) end of the intensity/color mapping range. If there is no signal (pixels) at the lower end of the X-axis, it may improve live-image display to drag the black point (or type into the box) to where the bar graph shows that data are present.
- Gamma: Drag the gamma control (or type into the box) to adjust color mapping intensity in a non-linear fashion. This effectively emphasizes either the darker (gamma ≤1) or lighter (gamma ≥1) pixels in the image.
- White point: (white triangle) The white point defines the upper end of the intensity/color mapping range. Similarly to black point adjustment, you may want to drag the white point to where the upper pixel intensity value that has associated image data.
Color and monochrome camera feeds
-
Color: Four colors are displayed in the histogram. They represent the RGB camera image, as well as the overall illumination intensity (gray).
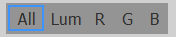 You can choose which (or All) of the colors/illumination to display in the histogram by clicking to toggle their display on or off.
-
R,G,B: You can display any or all of red, green, or blue channels by clicking to select the corresponding letter.
-
Lum: When selected, luminance, a weighted sum of red, green, and blue, is displayed in grey.
-
All: Displays all colors and luminance when selected.
-
- Monochrome: The illumination-intensity histogram is displayed.
Clip Detect checkbox
Check the box to identify and display any clipped pixel (i.e., a pixel value at the maximum intensity) with the Key color. This is useful to identify overexposed areas and make adjustments.
To set Clip Detect values:
- Go to File > Hardware setup > Camera Setup.
- Click the Settings tab.
- Enter the desired values under Clip Detect Levels.
Bit depth drop-down menu
Bit depth specifies how much color information is available for each pixel in an image. Select a value from the dropdown menu to view the camera feed at a lower bit depth.
-
This option is available for camera feeds with a native bit depth greater than 8.
-
Reducing the bit depth (intensity/color mapping range) may make it easier to adjust the black and white points.
Camera-histogram buttons
The buttons at the bottom of the camera histogram window are described here:
Applies setting(s) typed into the black, gamma, or white boxes under the histogram; active only if you have entered a value into one or more of the boxes.
Toggles between current and previous black, gamma, and white values.
Restores the full range of the histogram, with black = 0, gamma = 1, white = maximum pixel value for the camera
Adjusts the range to match the pixels that are showing in the image; if the range is not wide enough, the image will look noisy, and typically provides the "best" view of the image.
Also see How do I interpret a camera histogram for brightfield?