Interpreting the Camera Histogram for brightfield microscopy
See also Camera histogram
- If the live image on your microscope-connected computer screen does not match what you see by looking through the microscope eyepieces, you may need to adjust the white balance.
- If the live image matches the image in your eyepieces, examine the gray part of the camera histogram to assess the quality of the image.
Examples:
|
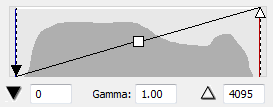
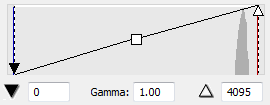
IdealThis is an ideal histogram for most types of brightfield data. The histogram, and therefore the dynamic range, is distributed over nearly the entire range of the camera. |
|
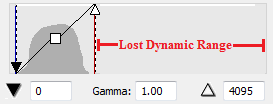
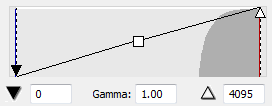
Low dynamic rangeTry increasing the exposure time and or the illumination until the histogram fills at least 2/3 of the histogram window.
You can move the white point slider to the left to improve display of the live-camera image on screen, however, most of the potential dynamic range is lost and the signal-to-noise ratio is lower. |
|
|
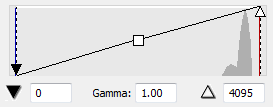
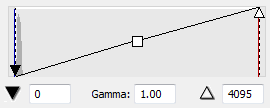
Background-image histogramThis shows an ideal histogram for a brightfield background image.
|
|
|
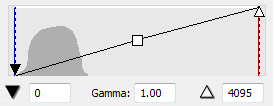
Background image with dust/artifactsThe small hump adjacent to the narrow peak indicates the presence of dust or other artifacts in the background image.
|
|
|
OversaturationIf the image is completely saturated, the histogram appears cut off on the right. Enable Clip Detect if you suspect oversaturation; pixels that are at the maximum will show most of the image as red.
|
|
|
Inadequate lightThis histogram suggests that the light source is not sufficient for the camera. To correct this, examine an image through the microscope eyepieces.
|