Colocalize markers

|
With this tool, you can combine two, three, or four markers into one marker for colocalization analyses. |
Procedure
- Place markers in your image.
-
 Click the Tools button in the Registration ribbon to view the Tools drop-down menu
 -
 Click the Colocalize markers button. The Colocalize markers window opens:
- Combine these markers: From the top set of markers, select up to four existing markers to be replaced with a single colocalization marker.
- Select one marker to show colocalization: From the lower set of markers, select one marker to represent the colocalized markers selected in the previous step.
Adjust settings for the marker replacement:
Colocalization distance determined by: Choose a method to set the maximum distance between colocalized markers
Adjust other settings as needed (see the Reference section below).
- Identify the colocalization markers: Click the button to either or
- Click
Reference
-
Enable colocalization markers checkbox: Check the box to enable the colocalize markers function.
-
Manually select button: Click a group of markers to replace them with a colocalization marker.
-
Find all button: NeuroInfo software finds all of the placed markers that you indicated should be combined and replaces them with a colocalization marker.
-
Delete marker combination when placing a colocalization marker checkbox: If you don't select this option, the colocalization marker is displayed along with the original markers.
-
Apply colocalization markers to all sections checkbox: This is relevant when markers are selected for replacement using the Find All button. Check the box to include all sections in the marker replacement. Leave the box unchecked to apply colocalization markers to the current section only.
-
Colocalization distance determined by:
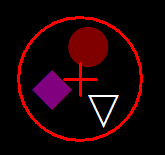
- Circular cursor size: cursor size defines the maximum colocalization distance
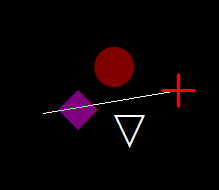
- Custom distance: Click the Measure button then place the cursor on the edge of a group of markers; click once, drag the mouse to draw a line to include all markers then click again to end the line. The measurement will be used as the distance.

