Edit Trees Panel (3D)
See Editing trees (3D) for detailed instructions
You can edit entire trees or individual points on a tree.
To view more options in the panel, select trees first (click the Select All button or click a tree model).
Click the button to select all the traced trees.
Select a tree then click the Hide selection button to hide it.
You can show the tree again later by clicking the Show selection, or the Show all hidden button if you've hidden multiple trees.
Click the button to view the trees displayed as a series of points.
The Points mode enables Detach at a specific point, Connect and Directionality.
You can move and delete points, and adjust a point's thickness.
Click the button to enable the Detach mode. If you also click Points, you'll be able to detach with more precision.
Click a tree to detach.
- If you click somewhere on a single branch, the tree is split in two.
- If you click the site of a bifurcation, the tree is split in three
When you're done detaching, make sure you click Detach again to disable it.
Click the button to display trees as series of points and enable the Connect mode.
Click and drag an end point toward the area you want to connect to. The end point briefly turns green and a green line appears. Release the mouse button to connect the branches.
Use to assign tree types, which is useful for later analysis in Neurolucida Explorer.
Select a tree then select a type from the Type drop-down menu.
To change the color, select a tree then click the arrow near the colored square to access the Color menu. 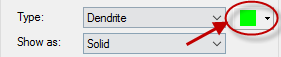
Select a tree then drag the Transparency slider. 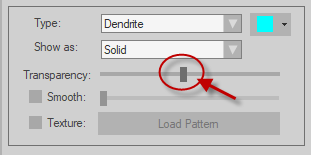
If you want a tree to be entirely invisible, use the Hide selection button instead of changing the transparency.  If you set transparency to its maximum value, you won't be able to select that tree again later.
Select a tree, check the box, and drag the slider to obtain a less jagged tracing. ![]()
This feature is for visualization purposes only (e.g., snapshots for publications); it doesn't affect your data.
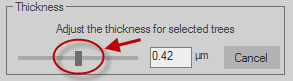
You may change the thickness of an entire tree or the thickness at a single point (or a group of points).
For a single point, click the Points button, click a point in the model to select it, then drag the slider.