Detecting and editing synapses(3D)
Before you start
- Make sure you have a 3D fluorescent image with at least two channels.
- Trace the trees.
- We recommend that you use the Image Slice view (see The Image panel (3D))
Detecting synapses
In the 3D environment, click the Synapse button to display the Detect Synapses panel.
- Under Image channels, select the correct channels.
- Click Detect All for an initial detection with the default detection settings. Automatic detection may take a few seconds.
- Adjust the Detection settings to improve the detection.
- Sensitivity: A lower value may result in fewer synapses detected.
- Surface clearance: Distance from the traced external boundary of the process to the proximal edge of the punctum.
- Outer range limit: Distance from the traced external boundary of the branch to the distal edge of the punctum.
If the checkbox is NOT checked, the program filters out all the puncta that are not in contact with the traced branch.
- Click Detect All to detect again with the new settings.
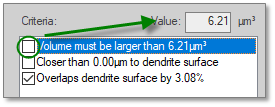
- Select a representative synapse to re-define detection criteria:
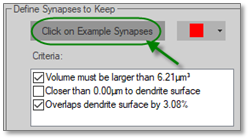
- Under Define Synapses to Keep, click the Set Criteria from Examples button.

- Click a representative synapse in the image. The criteria are updated based on the synapse you just clicked.
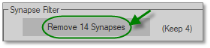
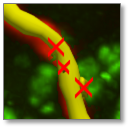
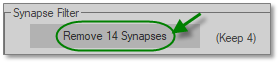
- Objects that don’t meet the criteria are marked with an X. Click the Remove … Synapses button to discard the objects marked with an X.

- Optional:
- To ignore a criterion, uncheck the corresponding box.
- To modify the value of a criterion, highlight the criterion then enter a new value in the Value field.
- Under Define Synapses to Keep, click the Set Criteria from Examples button.
Editing synapses
To display the panel, click Edit . 
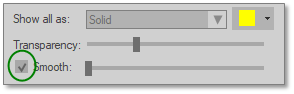
Changing display type or color
- Click the Select All button (only applies to all synapses).
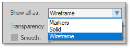
- Select a new option from the Show as or Color drop-down menu.
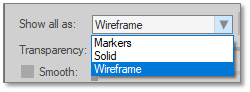
Increasing transparency or smoothness
- Click Select All or click individual synapses.
- Smoothness: Check the box to enable the slider.
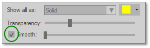
- Move the slider.
How are synapses detected?
Once you've clicked Detect All Synapses, the program implements two steps:
- Branch definition: the program re-traces branches based on the existing tracings.
- Objects (puncta) detection is implemented within a defined volume (toroid) around the branch.
Edit synapses (3D), Analyzing spines and synapses with Neurolucida Explorer