Splicing processes (2D)
See Connecting processes in Editing trees (3D)
What is the purpose of splicing?
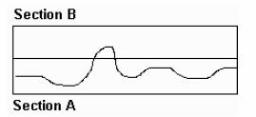
When tracing in serial sections, two processes may appear to exit a section close together. But when tracing in the next section, it becomes apparent that the two processes are actually one continuous process with a short segment in the second section.

|
|
Splicing allows for joining two processes after they have been completely traced in two sections as separate processes.
Procedure
- Click Trace>Edit>Select objects and click a branch to select it.
- Place the cursor over the end of the branch, right-click and select Splice. A line extends from the end to the cursor.
- Move the cursor over the end of the branch you want to join to. A circle appears at the end.
- Click to splice the two branches. You are prompted to "adjust the Z values of the spliced branch to match those of the selected neuron."
Click No to avoid introducing distortion into the Z position of the newly joined branch.
Splicing and directionality
The program marks the first point placed to trace the process as the beginning of the process.
To determine whether a point is a beginning or an ending, click Trace>Edit>Select objects, click the traced process to select it, and hover over the point.
- The letter E indicates an ending.
- The letter B indicates a beginning.
To change a point from an ending to a beginning, right-click the ending and select Change Ending Type. Select Origin Ending.
- Click Trace>Edit>Select Objects and click process α to select it.
- Hover over the ending of process α until the letter E displays (to indicate an ending).
- Right-click over the E and select Splice. A line appears, connecting the ending of process α to the cursor.
Click the beginning of process β to splice the processes. You are prompted to "adjust the Z values of the spliced fragment to match those of the selected neuron."
- If you are confident that process β was recorded at the correct Z depth, select No. The splicing segment traverses the Z depth between the two fragments. Use the Orthogonal View to check that the jump is not too abrupt.
- If you have not set the Z depth of process β, select Yes. The beginning of process β is assigned the same Z depth as the ending of process α.
- Click Trace>Edit>Select Objects and click process α to select it.
- Hover over the ending of process α until the letter E displays (to indicate an ending).
- Right-click over the E and select Splice. A line appears, connecting the ending of process α to the cursor.
Click the ending of process β to splice the processes. The beginning of the more distal segment (β) is automatically changed to a Generated Ending (GE).
The program automatically renumbers the branch order of branches on the processes spliced together.
Attempting to splice a beginning to a beginning results in an error message with instructions to flip the orientation of one of the process fragments.
To flip the orientation:
- Click Trace>Edit>Select Objects and click the process to flip to select it.
- Right-click and select Change Ending Type.
- Select Origin Ending (indicated by the letter B). The branches are automatically renumbered.