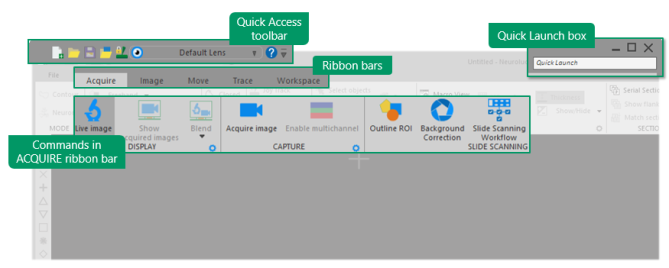
Microlucida interface overview
Browse the slideshow for a brief overview of the tool ribbons and other elements in Microlucida software.
Microlucida software functions are grouped into regions in the Main window:
-
The Quick Access toolbar at the top provides easy access to the tools you use frequently.
-
The Tool Ribbon is arranged with tabs that contain most of the tools you need to use the Microlucida system. Click a tab to access the File menu or any of the task-oriented ribbons that each contain related tools and commands.
-
The Viewing window displays your specimen: choose the live image from your Microlucida system, view an image file acquired previously, or a Blend of the two.
-
Docked tool panels: Customize your workspace by setting up docked windows for tools that you use frequently. In the default setup, tool panels required to use the Microlucida system are "docked" on the right side of the viewing window. Move them around and/or dock additional tool-panel windows by clicking and dragging in the title area of the window.
-
The Status bar at the bottom of the Microlucida software window reports ongoing processes and alerts you if there are problems; cursor information is on the left, status or instructions related to the current process or task are in the center, and notification of warnings or errors appear on the right. Learn more about the Status bar.


 Find commands to