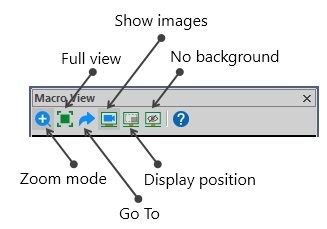
Macro View
macroview
The Macro View window provides an aerial view of the entire tracing (with or without images). The view is a top-down perspective along the X and Y axes (same as the view used in the tracing window).
To open the Macro View window, go to Workspace>Views>Macro View.
You can use it to quickly move to a specific part of the tracing outside of the current field of view: In Macro View, click the Go To icon then click the area of interest; the area you clicked will be displayed in the tracing window.
Macro View options

| Zoom | Draw a marqueeDraw a rectangle by dragging your mouse from the top left corner to the bottom right corner. around an area of interest in Macro View to zoom in on it. The Zoom mode only applies to Macro View; it does not apply to the image displayed in the main window. |

|
| Full view |
Zooms the view out so that the entire tracing or image is visible. |
|
| Go To |
Drives the stage (if using a slide on the microscope) or the image (if using an image file) to a desired location. Use this feature to navigate around the slide.
|
|
| Show images |
Image(s) displayed along with any tracings and/or markers. |

|
| Display position |
Displays the tracings and markers overlaid on a gray background in the position that they appear within the image. |

|
| No background |
Displays tracing or markers overlaid on the image only over a clear background. |

|
To use the options, click the icons in the Macro View window or right-click in the Macro View window.