Procedure
The workflow displays a list of the sections and contours that were drawn for each section.
- Click the name of a contour to select it.
- (Optional) Sampling: Confirm the sampling parameters to be used.
- Click Start counting. The workflow displays new options for counting.
-
Start counting in the first site.
- Select a marker from the Use Marker drop-down menu in the workflow.
-
Optional: Check the Enable middle mouse button for placing markers box to mark two populations simultaneously with identical sampling parameters (use for population estimates of two similarly frequent populations).
-
If you check the box to Enable middle mouse button for placing markers, we strongly recommend that you select a different marker from the Middle Mouse Button Marker drop-down menu.
-
If you chose to include a second
-
- Focus through the tissue to find the unique point of the particle. If you focus above or below the tissue (i.e., outside of the green area displayed in the Z meter), the cursor changes to indicate that you're outside of the appropriate area.
 About the unique point
Many researchers are counting cells and use the cell top as the unique point to count, but the top of the nucleus or nucleolus (provided that the nucleolus is unique to the cell) is a good alternative. The "unique point" must fall within your disector height (shown as green in the z meter). The rest of the object you are counting may be anywhere relative to the counting frame, but only the unique point matters when deciding whether or not to mark an object as counted.
- If the unique point comes into focus while in the guard zone (shown as red in the z meter), do not count it!
- When the unique point comes into focus, place a marker on it in accordance with the rules of the counting frame.
-
Click the "unique point" to place the marker. See "Counting Rules"
-
Repeat steps c-d for the other objects that can be counted in the site.
-
Once you've identified all the objects in the site, click the next button in the workflow to move to the next counting site.
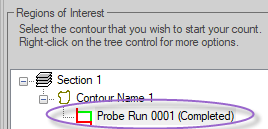
- Once you have visited all the sites, the probe run is displayed under Regions of Interest .
- Select the next section: Click the Begin Next Section button.