Camera histogram
The camera histogram displays a graphical representation of the dynamic range (visual brightness and contrast) of the live image. It will vary from camera to camera, depending on the driver used and the features supported by the camera.
- Color mode: Four colors are displayed in the histogram. They represent the RGB camera image, as well as the overall illumination intensity (gray).

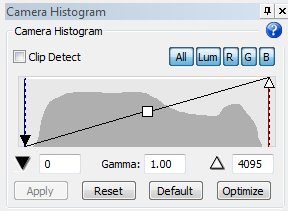
- Monochrome mode: Only the illumination intensity histogram is displayed
 .
.
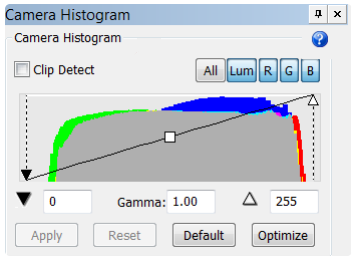
To take full advantage of the dynamic range of the camera, spread the histogram all the way across the X-axis, while ensuring that the image does not display over-exposed portions.
There are three methods to adjust the histogram:
- Turn up the light-bulb amplitude.
- Add or remove neutral density filters
- Adjust the exposure ()
Camera Histogram Panel Settings
|
Finds and displays any clipped pixel (max intensity value) with the Key color. This is useful to identify overexposed areas and make adjustments.
|
Expands the range of the histogram (from the black to the white triangle) to its full range (255 shades of luminosity); typically provides the "best" view of the image. |
|
Adjusts the range to match the pixels that are showing in the image; if the range is not wide enough, the image will look noisy, but this can be a good method to reduce your exposure as lower exposure times can be used with smaller ranges. |
Discards changes and returns to the original display. |
|
Absolute black (0%) is the lower-left corner (black triangle), while absolute white (100%) is the upper-right corner (white triangle).
|
You can change the display to be only Red, Green, or Blue channels. |
|
Displays luminance, which is a weighted sum of red, green, and blue. |
Also see How do I interpret a camera histogram for brightfield?