Editing puncta (3D)
 In the 3D environment, click the puncta button to display the
 then click the Edit button.
-
To access all puncta-editing options, select the color channel used for puncta detection in the Channel panel.
Select puncta in order to edit them
Select puncta for editing using any of the following methods:
- Click the Select All button to select all detected puncta.
- Hold the Ctrl key on your keyboard and drag your mouse to select all puncta in the marquee (selection box) that forms.
- Click a single punctum with your mouse or hold the Ctrl key on your keyboard and click multiple puncta to select.
Splitting a punctum
To separate two puncta that are modeled as one due to physical proximity, use the Split button.
- Zoom, rotate, and pan as needed to view the punctum of interest clearly.
- Click to select the punctum you want to split.
- Click the Split button.
Merging puncta
To combine two puncta, use the Merge button.
- Zoom, rotate, and pan as needed to view the puncta of interest clearly.
- Hold the CTRL key on your keyboard and click the two puncta to be merged
OR press CTRL and drag the mouse to draw a marquee around the puncta to be merged. - Click the Merge button.
You can merge two puncta at a time. Repeat if necessary to merge more than two puncta into a single punctum.
Removing puncta
- Select the punctum/puncta.
- Click the Remove button or the Delete key on your keyboard to remove the selected punctum/puncta.
You can click Ctrl-Z on your keyboard to un-delete the punctum/puncta.
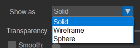
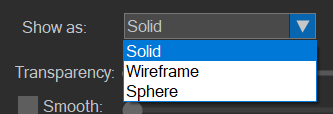
Changing puncta display
- Select the punctum/puncta.
- Select an option from the Show as drop-down menu.
Applying transparency, smoothness, or texture
These settings affect the appearance of selected puncta, but not the underlying data.
- Transparency: Use the slider to adjust transparency of selected puncta in their assigned color channel or when all color channels are displayed. The transparency setting specified here will be ignored if a different color channel is displayed, however, the transparency of puncta and any other traced structures associated with undisplayed color channels can be controlled using the Trace Opacity slider in the Channel panel.
- Smooth: Check the box and drag the slider to enable or disable smoothing.
- Texture: Check the box and click Load Pattern, then navigate to the location of the textures you want to use and click Open to apply the texture to the selected puncta.